World of Workflows Business Edition
World of Workflows Business Edition can be downloaded from here: latest release
Installation Instructions
Installing Pre-requisites
These instructions assume that you have administrative rights to your Windows Server.
1. Install IIS (if not already installed)
- Open Server Manager → Manage → Add Roles and Features.
- Choose Role-based or feature-based installation.
- Under Server Roles, check
Web Server (IIS) - Under Role Services, include:
• Web Server →
Application Development →
• ASP.NET (both versions if available, e.g., ASP.NET 4.8)
• .NET Extensibility
• ISAPI Extensions & Filters • Security → • Request Filtering
• Common HTTP Features → • Static Content, • Default Document - Complete installation and reboot if required.
2. Install the .NET 8 Hosting Bundle
On your Windows Server:
-
Download the .NET 8 Hosting Bundle from Microsoft:
Download .NET 8 Hosting Bundle
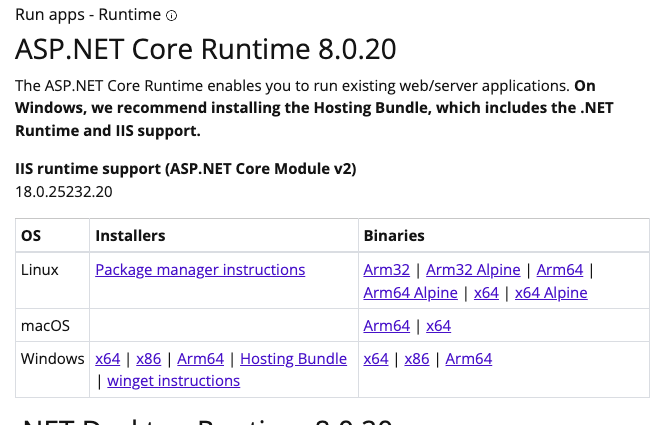
- Run the installer — it will:
• Install the .NET Runtime.
• Install the ASP.NET Core Module for IIS (so IIS can reverse-proxy to Kestrel).
• Register the module automatically with IIS. - Reboot the server after installation.
Install World of Workflows
-
Download World of Workflows Business Edition
Download the latest code from here: latest release.
Choose the file WorldOfWorkflowsBE-<version >-win-x64.zip -
Extract the .zip contents to a permanent folder, e.g.:
C:\inetpub\wwwroot\WorldOfWorkflows -
Make sure the folder has Read & Execute permissions for the IIS AppPool user (IIS_IUSRS).
- Configure IIS Site
-
Open IIS Manager → Right-click Sites → Add Website.
• Site name: WorldOfWorkflows
• Physical path: C:\inetpub\wwwroot\WorldOfWorkflows
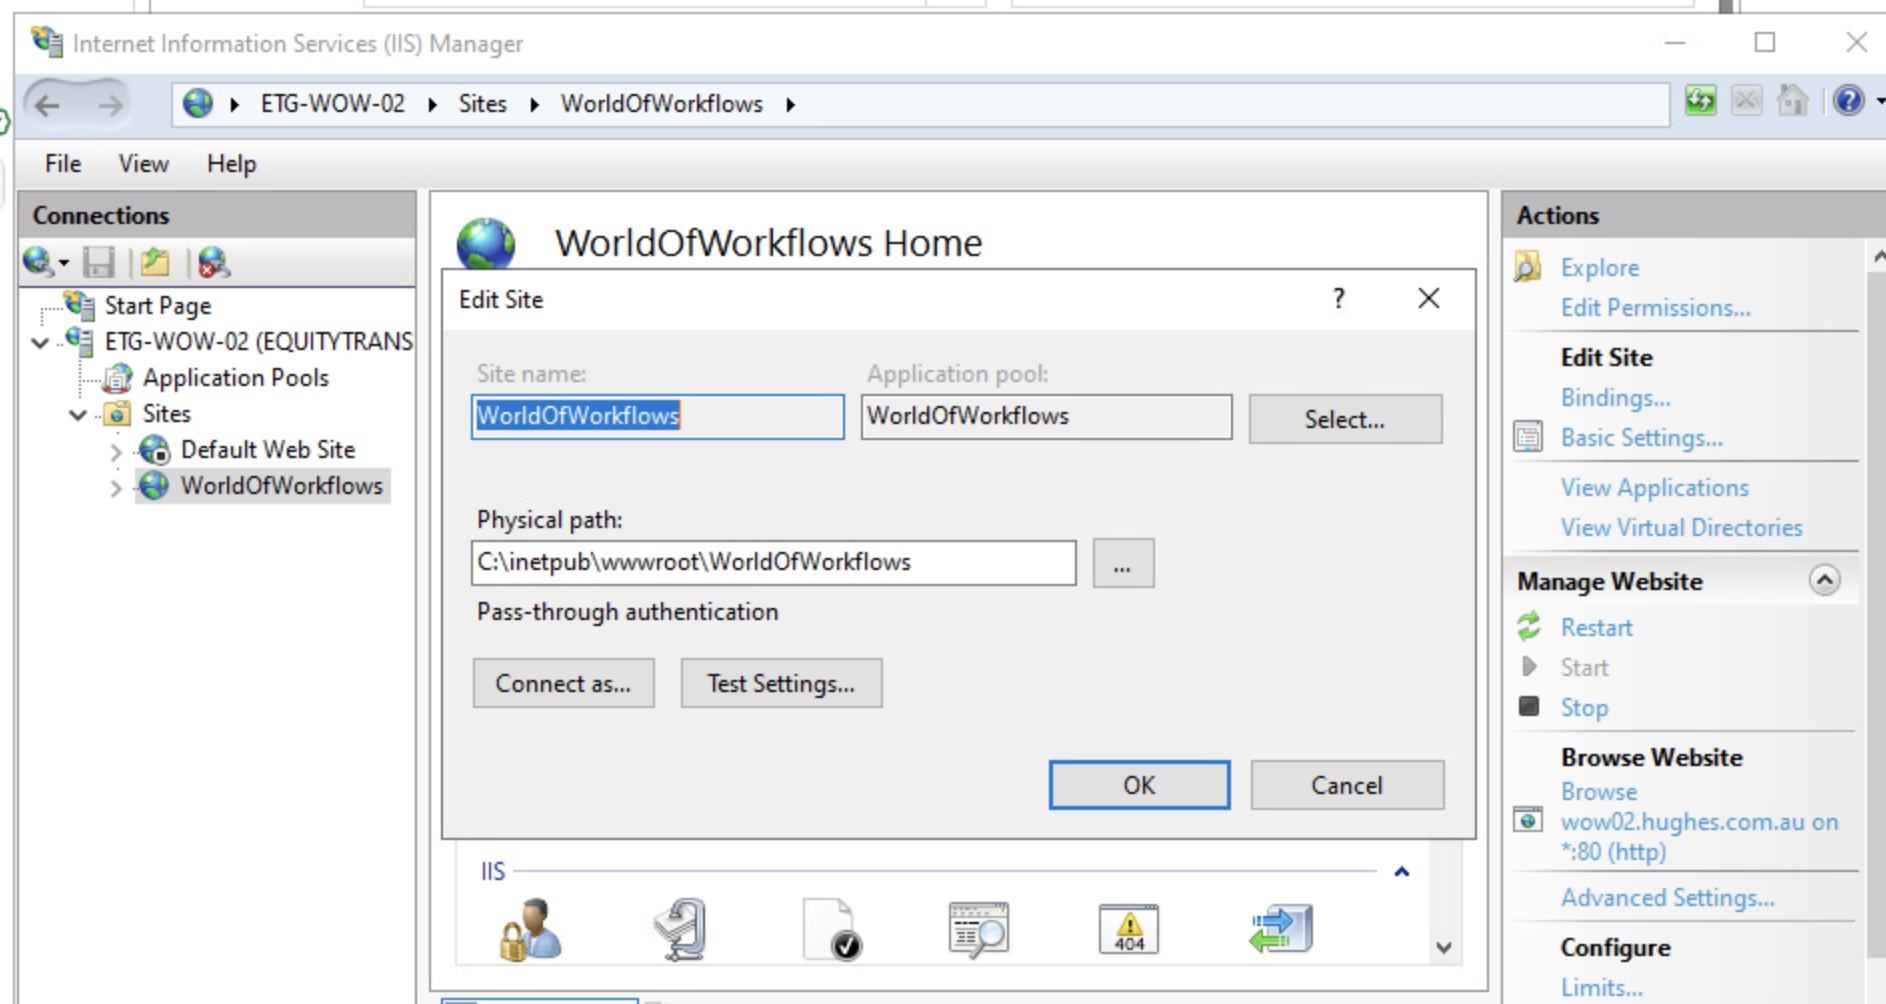 • Binding: http on port 80 (or another port if 80 is used). • HostName: set the server’s hostname - eg wow.yourdomain.com.
 -
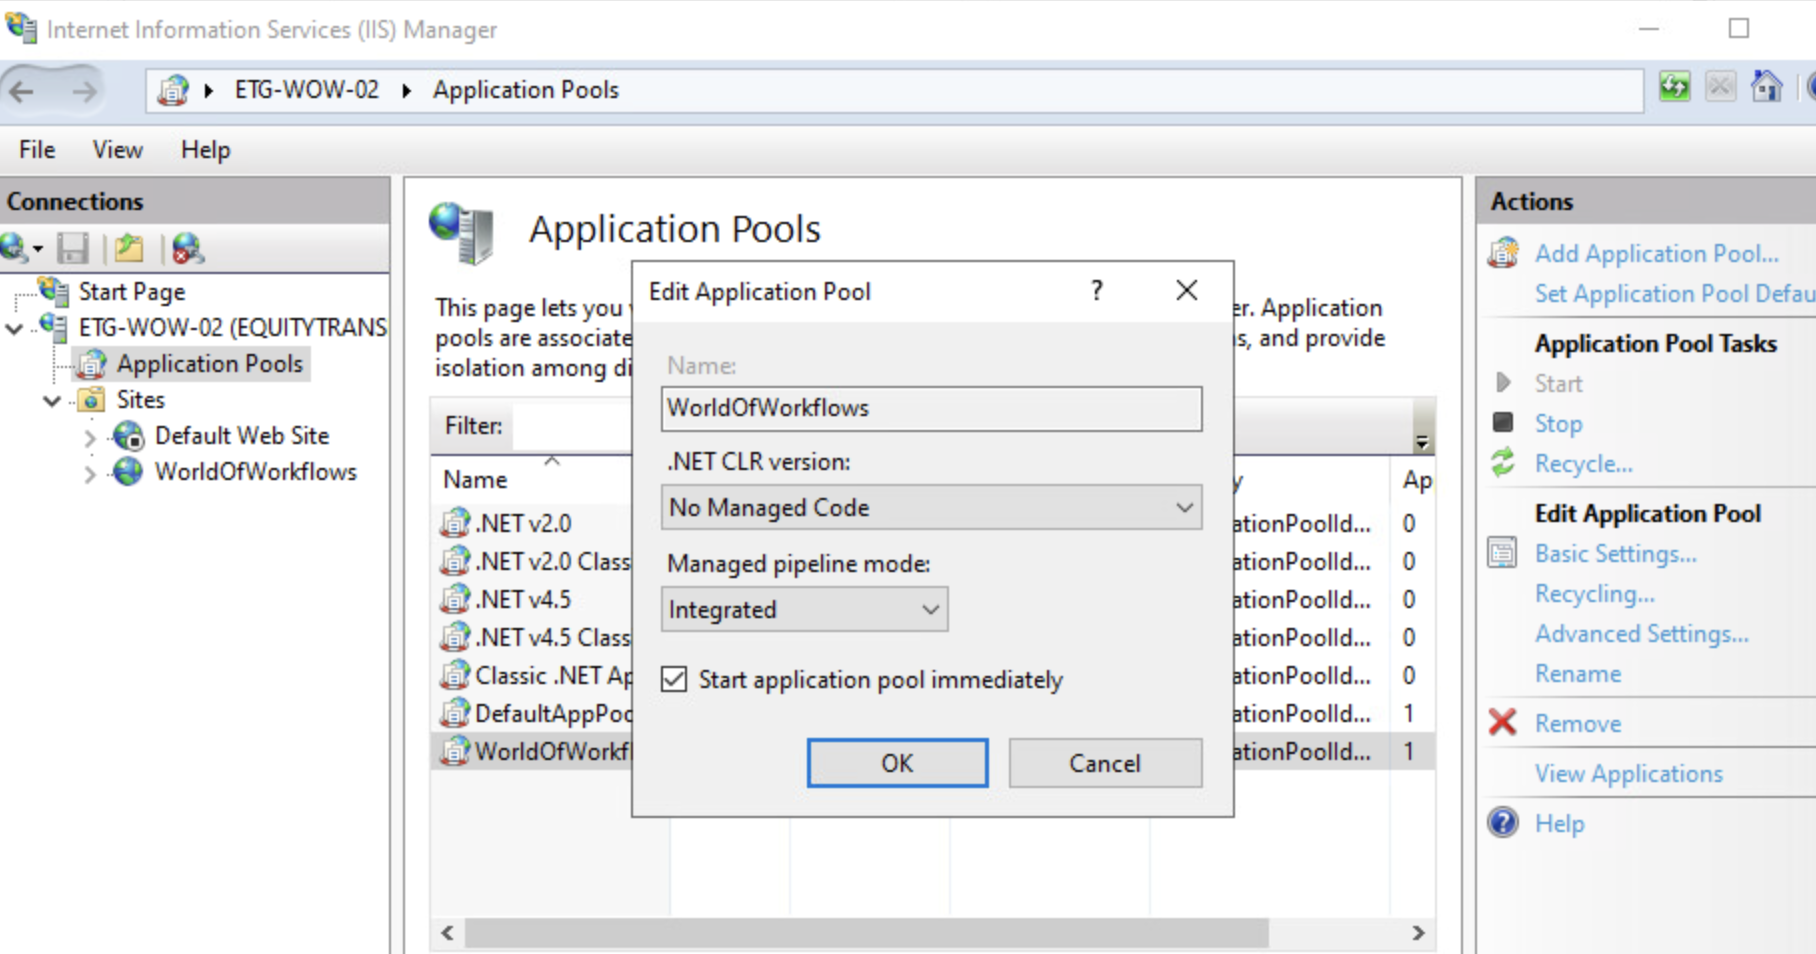
IIS will create an Application Pool:
• Set .NET CLR Version to No Managed Code
(ASP.NET Core doesn’t run on the IIS CLR — it runs on Kestrel).
-
Ensure the Identity of the App Pool (ApplicationPoolIdentity by default) has Read/Write access to the app folder if the app logs or writes files.
Grant read/write access toC:\inetpub\wwwroot\WorldOfWorkflowsfolder for the userIIS AppPool\WorldOfWorkflowsAlso set the same full control to the data folder where you will store your databases (d:\Data in the example appsettings.json)
-
Stop the
Default Web SitesiteNote: the Site name is also used by IIS to create an Application Pool.
Alocaluser is created calledIIS AppPool\<sitename>. This is the user you will need to grant access toC:\inetpub\wwwroot\WorldOfWorkflowsand the database folder.
-
-
Verify/update Web.Config The World of Workflows Business Edition .zip should already include a web.config with an
< aspNetCore />section.Changes to web.config automatically, immediately, restart IIS.
If you need to, update the logging to be enabled, like this:
<?xml version="1.0" encoding="utf-8"?> <configuration> <location path="." inheritInChildApplications="false"> <system.webServer> <handlers> <add name="aspNetCore" path="*" verb="*" modules="AspNetCoreModuleV2" resourceType="Unspecified" /> </handlers> <aspNetCore processPath=".\HubOneWorkflowsApp.Server.exe" stdoutLogEnabled="true" stdoutLogFile=".\logs\stdout" hostingModel="inprocess" /> </system.webServer> </location> </configuration> -
Create a logs folder
Create the folder
C:\inetpub\wwwroot\WorldOfWorkflows\logs
if you enabled log output inweb.config - Grant read/write access to the logs folder for the user
IIS AppPool\WorldOfWorkflows
Update appsettings.json
Here is a sample appsessings.json file. There are a number of items you will need to update:
- The ConnectionStrings section contains the location and filename of your two World of Workflows databases.
- the Elsa database holds the Workflow Definitions and Workflow Instance logs.
- the WorldOfWorkflows holds all the persistent data you create in
TablesWorld of Workflows."ConnectionStrings": { "Elsa": "Data Source=D:\\Data\\WoWWorkflows.db", "WorldOfWorkflows": "Data Source=D:\\Data\\WoWData.db;cache=shared" },
A note on SQLite database settings.
You may improve performance slightly by enabling ‘wal’ mode on a database, but only if the database is on a local disk. ‘wal’ mode uses a shared memory file, which must not be located on a network drive.
You must not enable ‘wal’ mode on a database located on a network drive.
To alter the journal_mode on a database, use a SQLite database editor, or a SQLite cli. The commands to change the journal_mode are:
- Check the current journal_mode:
sqlite3 {filename}.db "pragma journal_mode;" - Enable ‘wal’ mode:
sqlite3 {filename}.db "pragma journal_mode=wal;" - Disable ‘wal’ mode:
sqlite3 {filename}.db "pragma journal_mode=delete;"
Use
;cache=shared;on the connection string to a SQLite database when the journal_mode of the database is set to ‘delete’. If you change the database journal_mode to ‘wal’ you must remove;cache=shared;from the connection string. - The ClientConfiguration contains details on how authentication is set up within Entra AD. The
Authoritymust be set with your Azure Subscriptions Tenant Id.
TheClientIdmust be changed to your App Registration’s Client Id."WorldOfWorkflows": { "ClientConfiguration": { "WorldOfWorkflows": { "Server": { "Scopes": { "Default": [ "api://xxxxxxxx-xxxx-xxxx-xxxx-xxxx/.default" ] } } }, "AzureAd": { "Authority": "https://login.microsoftonline.com/xxxxxxxx-xxxx-xxxx-xxxx-xxxx", "ValidateAuthority": true, "ClientId": "xxxxxxxx-xxxx-xxxx-xxxx-xxxx" } } } - Add your server web url name to the
Corssetting, and any other servers you want to be able to access your server"Cors": { "AllowedOrigins":[ "https://xxx.domain.com","http://localhost"] }, - Add your server web url name to the
Kestrel.Enpoints.Public.Urlsetting and set your https certificate filename and password."Kestrel": { "Endpoints": { "Public": { "Url": "https://wow.xxx.com.au:443", "Protocols": "Http1", "Certificate": { "Path": "D:\\Data\\xxx.pfx", "Password": "xxx" } } } }
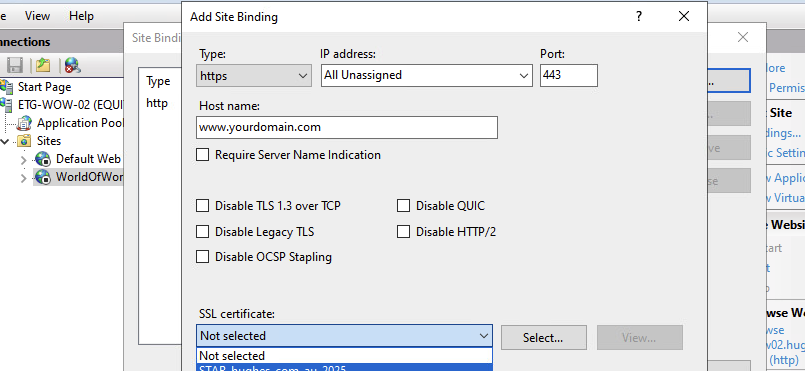
Set up web site for HTTPS / SSL
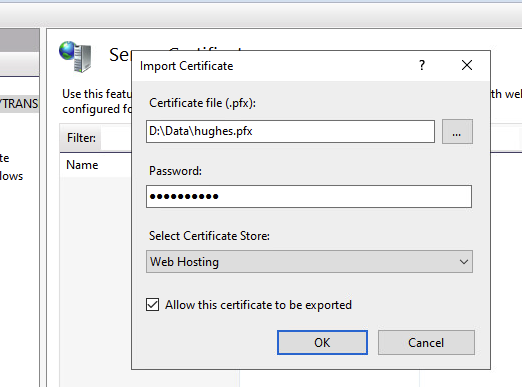
Import your ssl certificate into the IIS system.
Open IIS and go to the server settings.
Find Server Certificates and import your .pfx file. You will need to know the password.
Next, go the bindings on your World of Workflows website and add HTTPS:
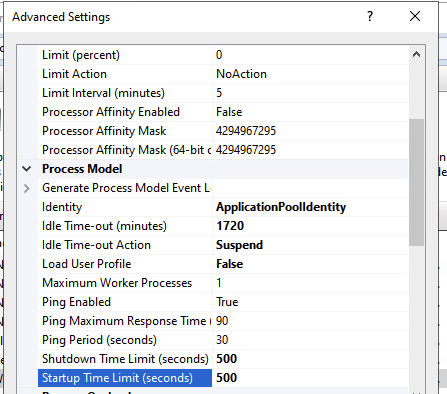
Update the Application Pool configuration
The defaults for the Application Pool can have the server shut down after 20 minutes of inactivity.
Open The WorldOfWorkflows Application Pool. Go to Advanced Settings and set these:
- Process Model - Idle Time-out (minutes): default is 20. Change to 1720
- Process Model - Idle Time-out Action: default is Terminate. Change to Suspend
- Shutdown Time Limit (seconds): default is 90. Change to 500
- Startup Time Limit (seconds): default is 90. Change to 500
Granting Permission to access the World of Workflows Admin page
Granting permissions in World of Workflows requires you first to configure the Server Entra Id Application and then assign permissions.
- Setting up Server Application
- You only need perform this once
- Navigate to Azure Portal –> Entra Id –> App Registrations
- Click All Applications
- Search for the Server application configured in step iv. above.
- Click API Permissions
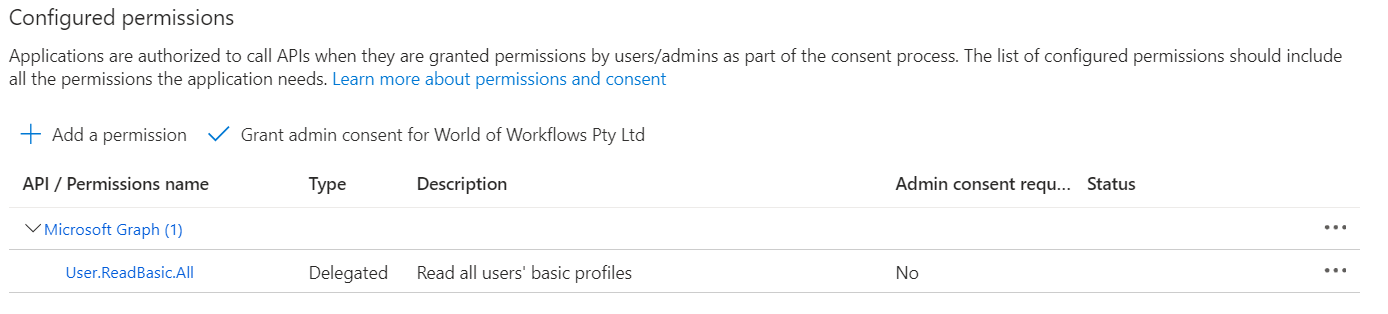
- Click Add a permission
- Click Microsoft Graph
- Click Delegated Permissions
- Select email, offline_access, openid and profile
- Click Add Permissions
- Click Grant Admin Consent
- Click Yes
- Granting Permissions
-
Navigate to Azure Portal –> Entra Id –> Enteprrise Applications
- Click X next to Application type == Enteprrise Applications.
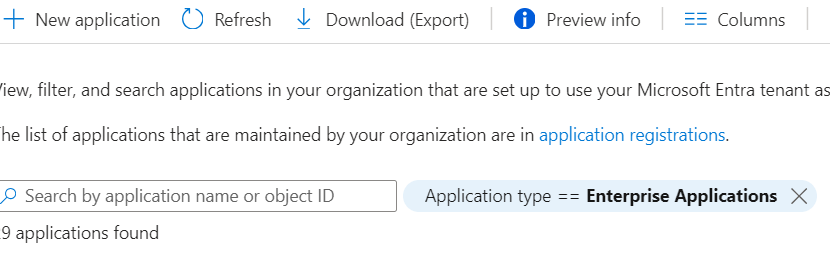
- Search for and select the server applcation congfigured in step iv above.
- Under Manage, choose Users and Groups
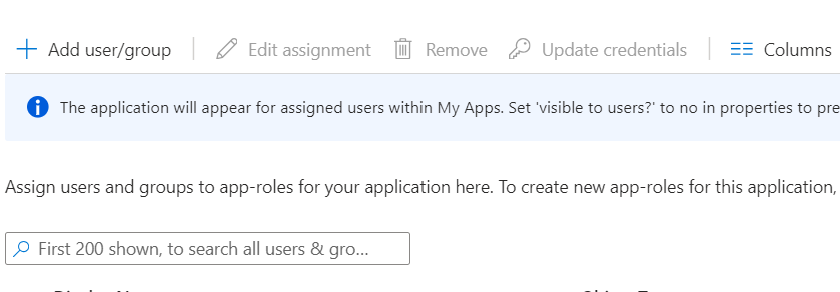
- Click Add user/group
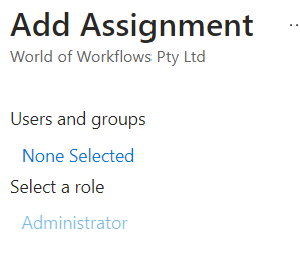
- Click None Selected
- Search for and select the User you want to grant permissions to
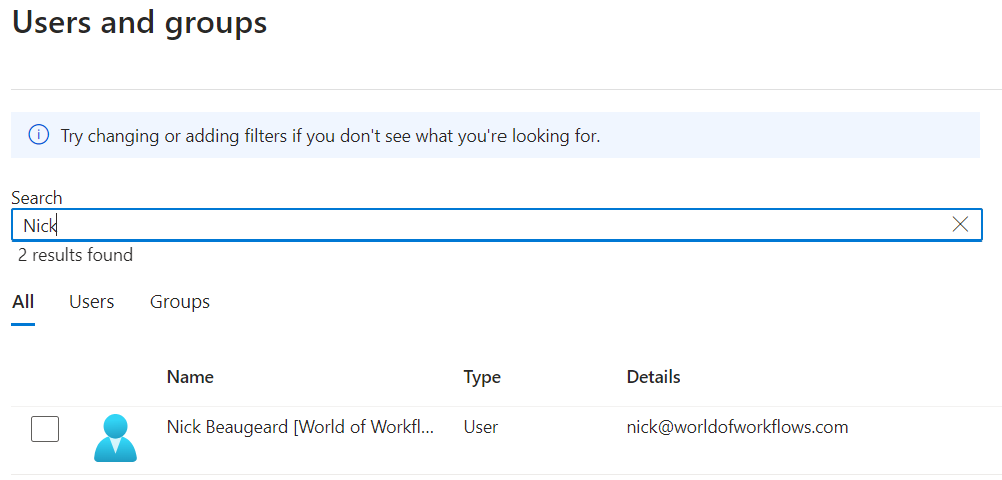
- Click Select
- Click Assign. Administrator is the only role available in this version
-
Now you can navigate to your new server and login.
Install a SQLite database tool
To maintain the database you might need a SQLite database editor. This is an example application:
http://sqlitebrowser.org/dl
To avoid database corruption, stop the IIS Service before making any changes to the SQLite databases, or even opening them in write mode.
It is generally safe to open the SQLite databases in ReadOnly mode while the IIS Service is running.