AI prospector
Available for Workflows Versions 1.3.440 and above Supports Workflows Business, Enterprise and PE
Prerequisites
- Open AI Developer Account - To create a new Open AI Developer Account, see here
- Office 365 Registered Application - To register a new office 365 application for World of Workflows, see here
Installation
1. Create Data Tables and Date
- Open World of Workflows
- Navigate to Admin
- Click Import
- Choose the file
Leads.csvfrom here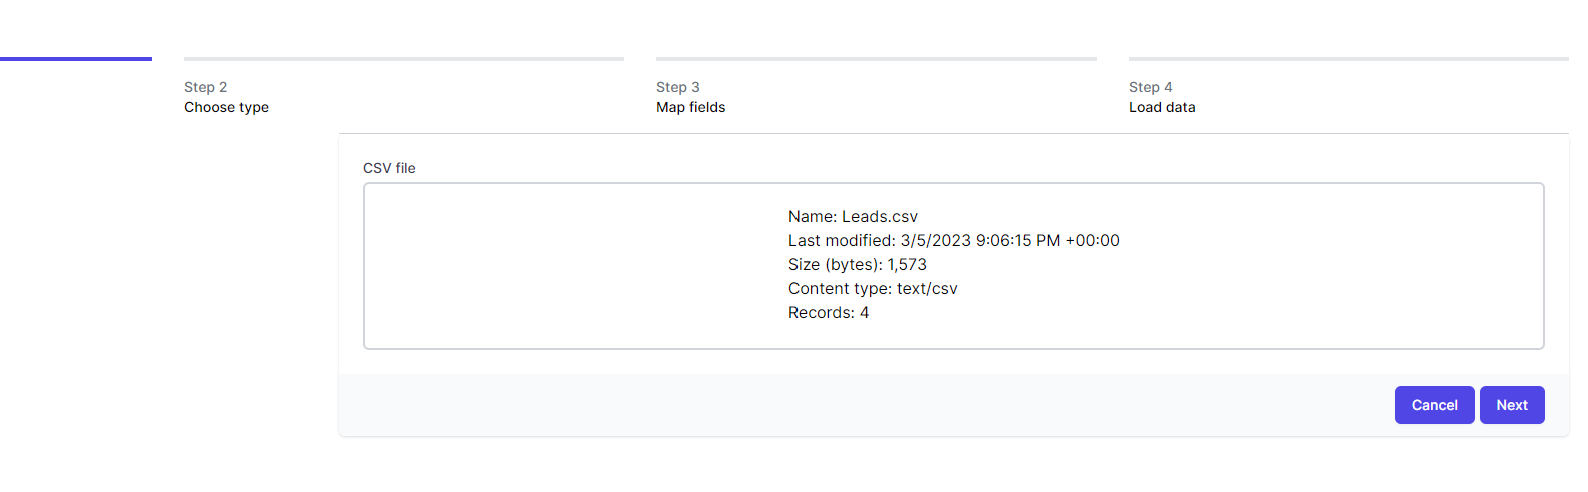
- Click Next
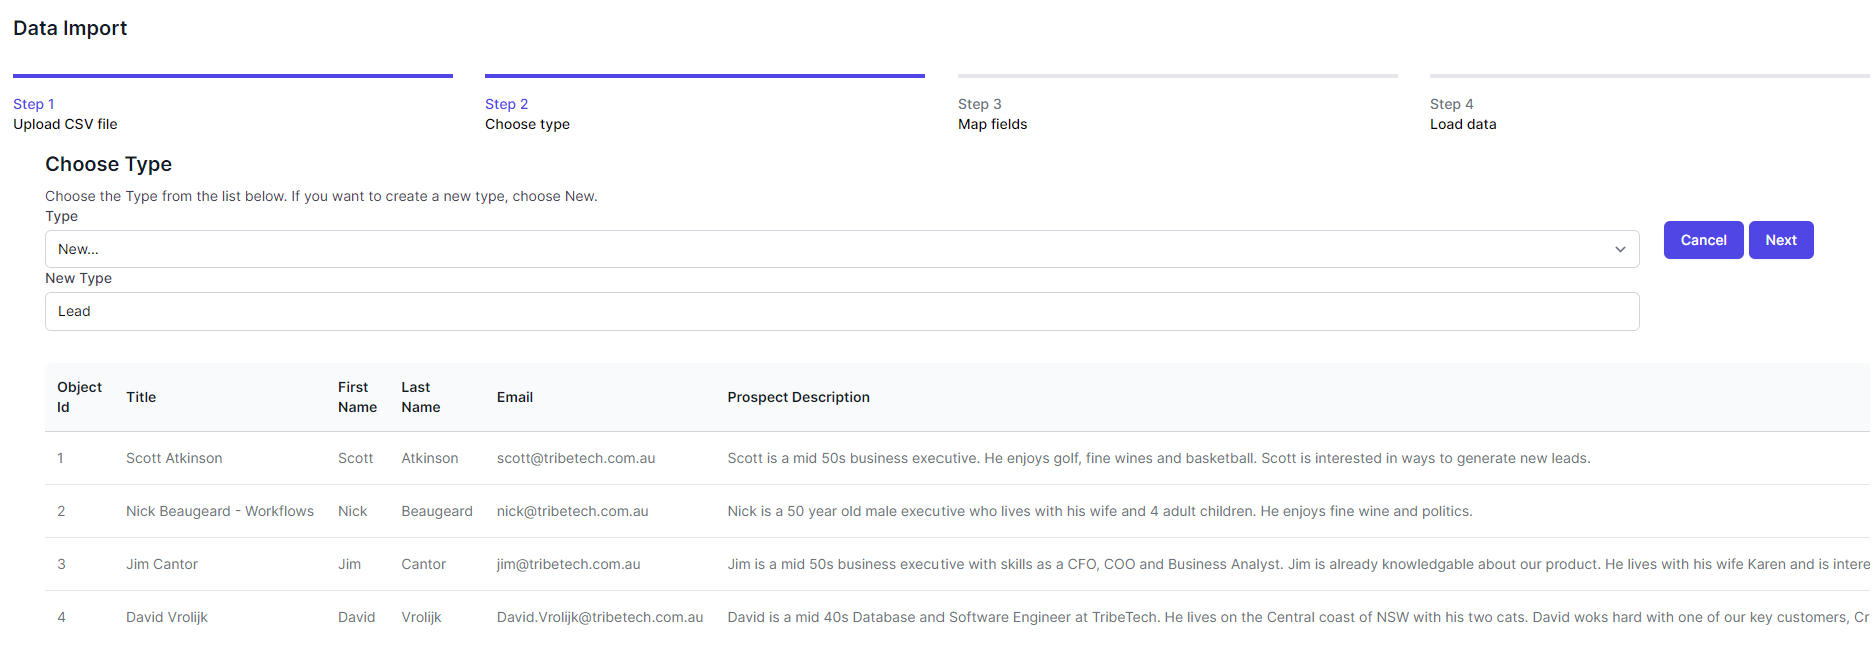
- Accept the defaults and click Next
- Click New for the following fields (and ensure Title has Is Title checked)
- Title
- FirstName
- LastName
- Prospect Description
- Value
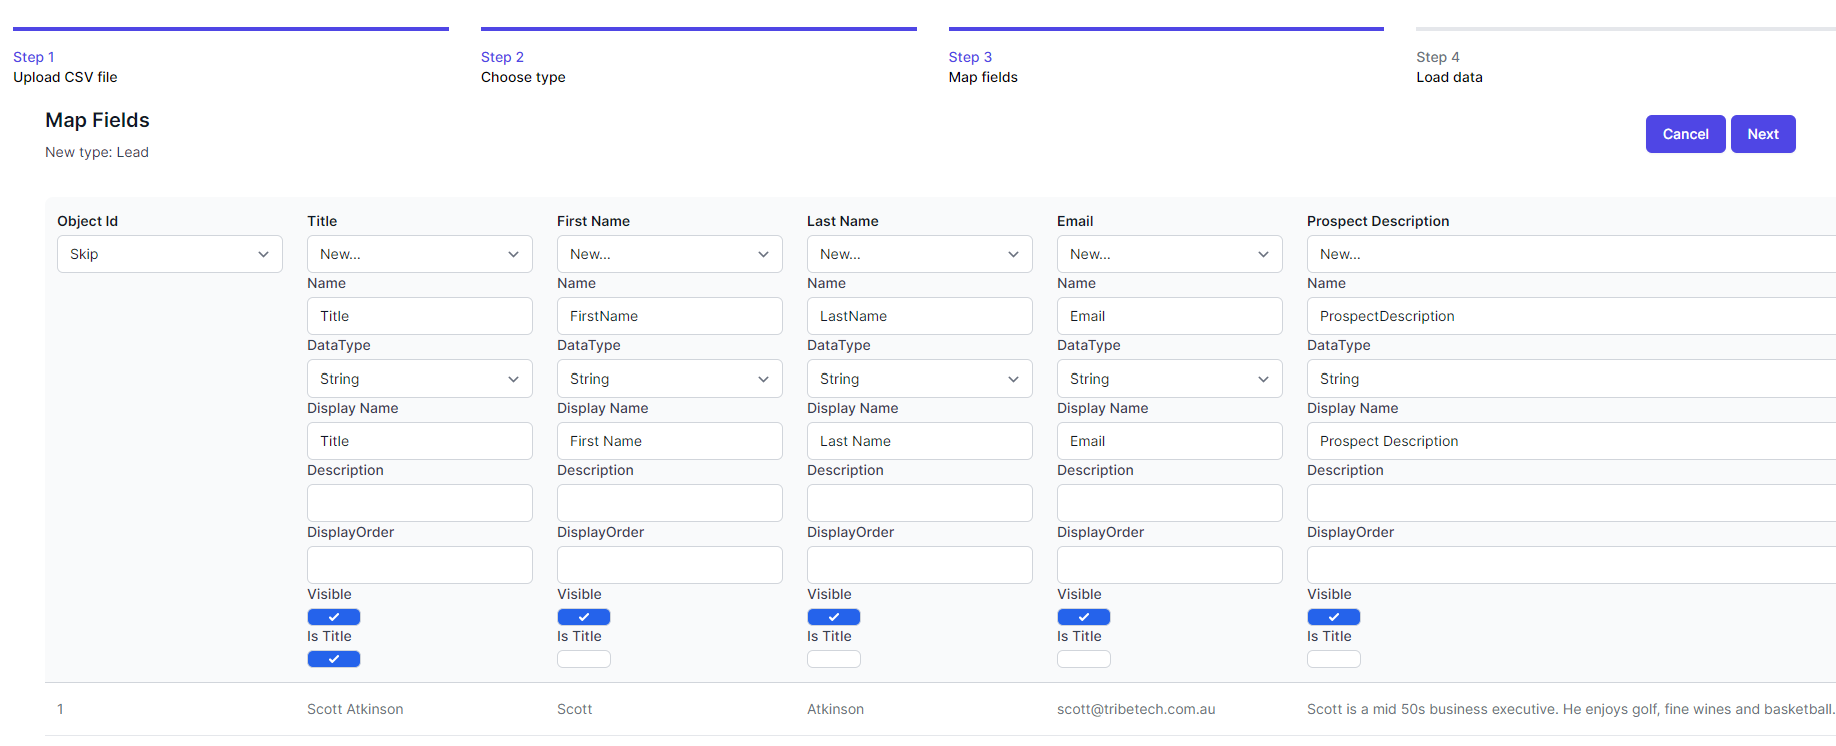
- Click Next

- Click Import
2. Create the Workflow
- Open World of Workflows
- Navigate to Admin
- Click Workflows
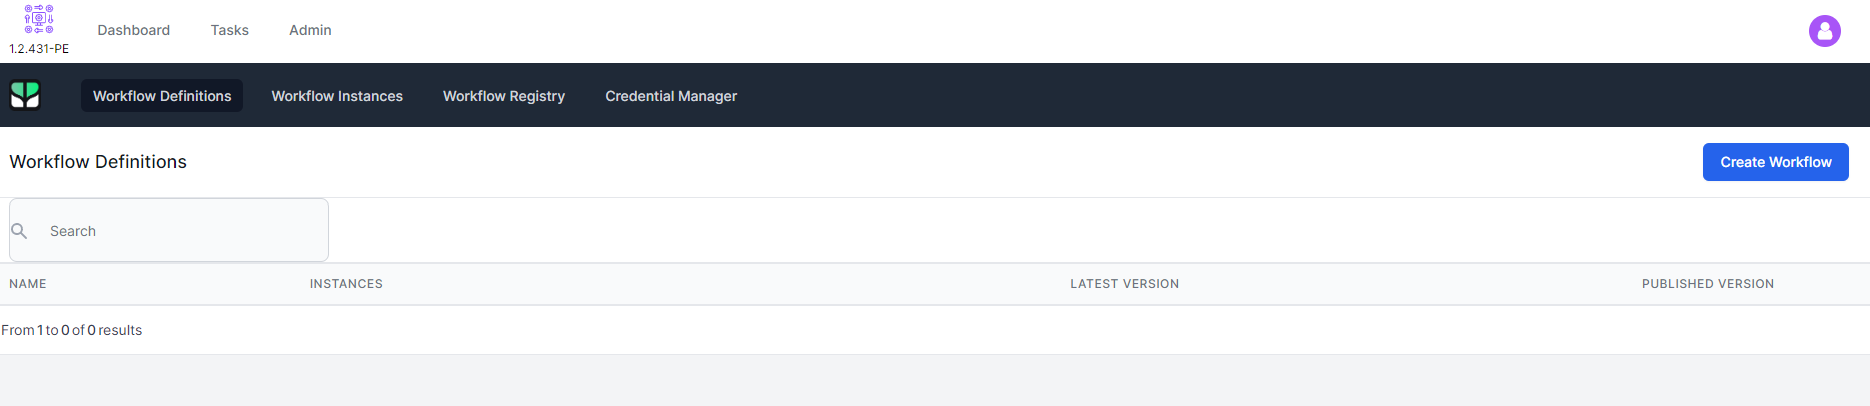
- Click Create Workflow
- Select the Publish drop down (bottom right) and click Import
- Choose the file
AI Prospector.jsonfrom here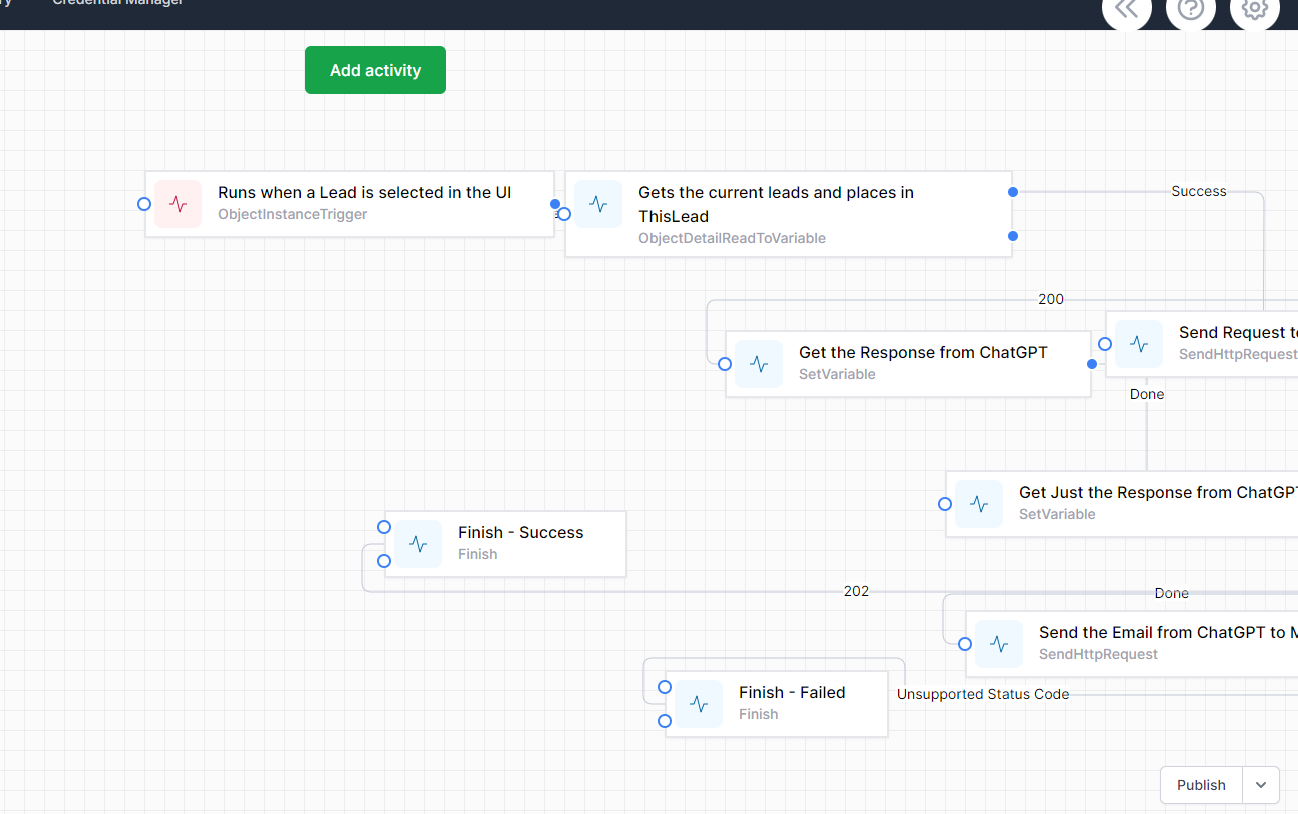
- Click Publish
3. Create Credentials
- Open World of Workflows
- Navigate to Admin
- Navigate to Workflows
- Click Credential Manager
Chat GPT Key
- Click Add New
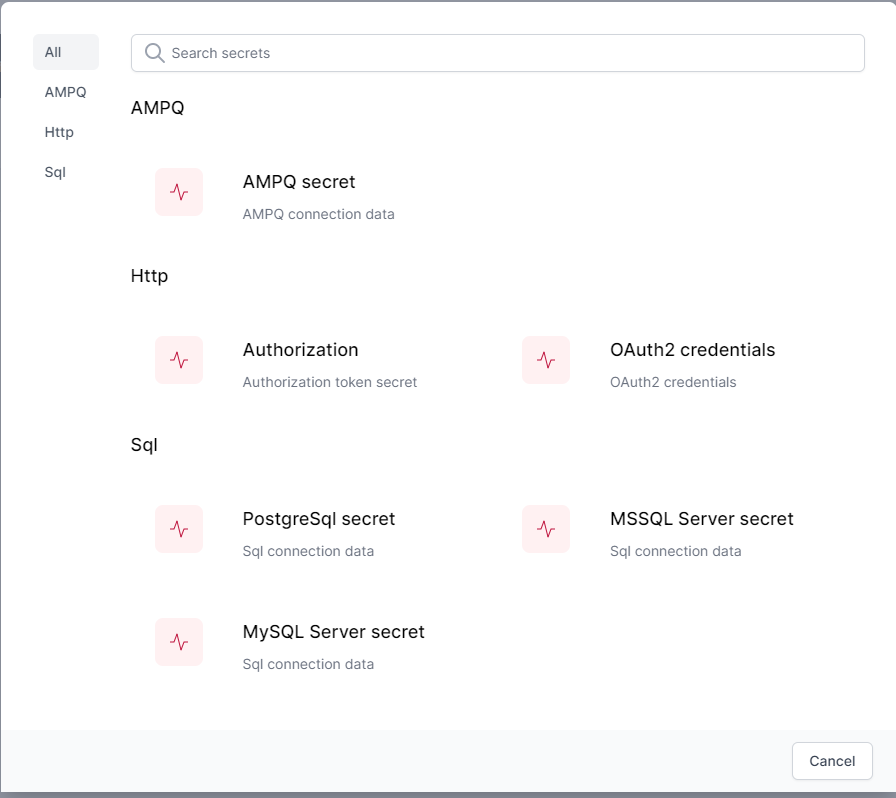
- Choose Authorization
- Enter the following:
- Name: GPTIII
- Authorization:
Bearer xxxwhere xxx is your Open AI API Key available here: https://platform.openai.com/account/api-keys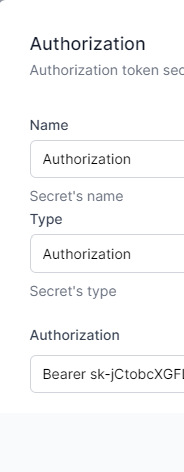
- Click Save
Office 365 Credentials
- Click Add New
- Choose OAuth2 credentials
- Enter the following:
- Click Authorize
- Enter your credentials and follow the prompts
- Click Save
Connect Workflow to Credentials
- Open World of Workflows
- Navigate to Admin
- Navigate to Workflows
- Click RunGPT3
- Find the Activity Runs when a lead is selected in the UI
- Right Click and Choose Edit
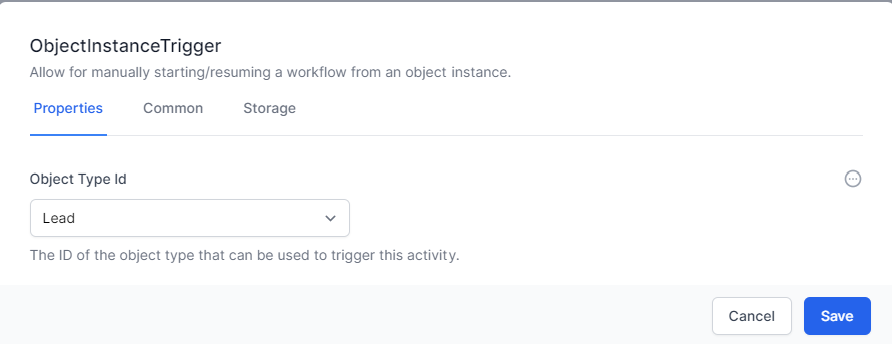
- Ensure the object Table Id is Lead
- Click Save
- Find the Activity Send Request to ChatGPT
- Right Click and Choose Edit
- Click the Advanced tab
- Drop down Authorization and change to GPTIII
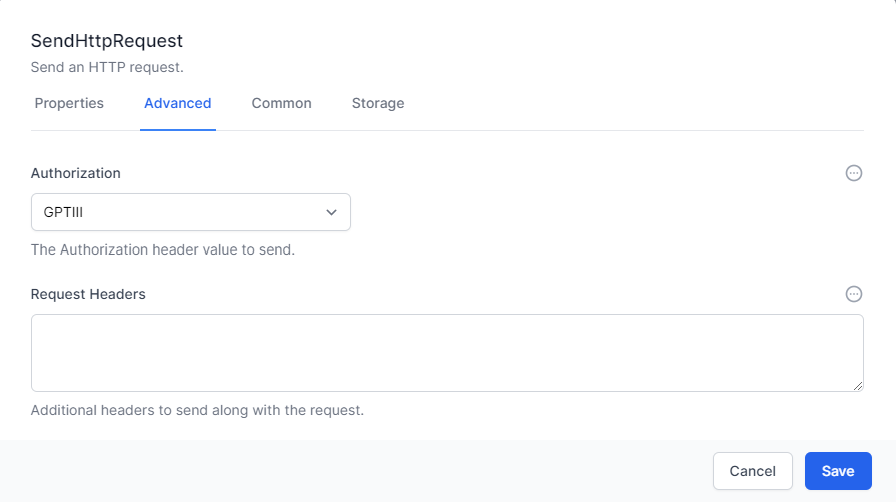
- Click Save
- Find the activity Send the Email from ChatGPT…
- Right Click and Choose Edit.

- Repalce
nick@tribetech.com.auandnick@releasedgroup.comwith your own email address - Click the Advanced Tab
- Change Authorization to Office 365 and click Save
- Click Publish
Run a workflow
- Open World of Workflows
- Navigate to Admin
- Navigate to Tables
- Click Lead
- Cick Lead 1
- Navigate to the Workflows Tab
- Find RunGPT3 and click Play
- Check your email for an email from yourself with a message about World of workflows.